How Do I Add Participants To My Project?
Learn how to quickly and easily add new participants to your project
Table of Contents
Once your project is created, the next step is adding participants, which we call Assignments.
Navigate to the Assignments tab
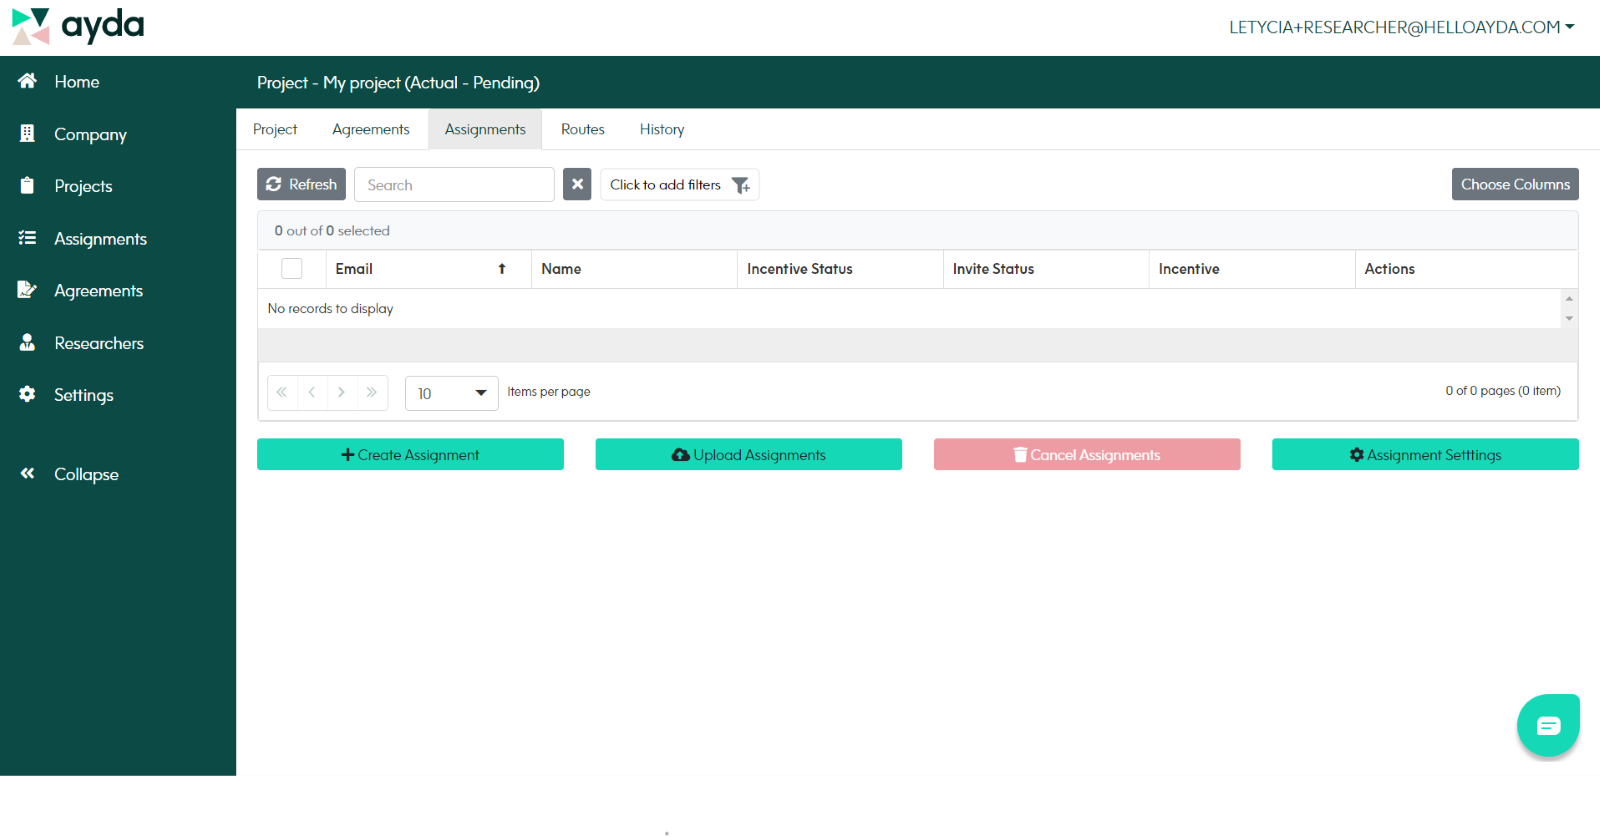
After creating your project, head to the Assignments tab. A user-friendly interface awaits you:

Explore options for adding participants
You have two convenient options:
-
Add participants individually by entering their full name, email address and incentive value. To do this, click the Create Assignment button.
- Streamline the process by uploading multiple participants at a time. To do this, create a spreadsheet with columns for the first name, last name, email, and incentive amount – then click the Upload Assignments button.
After choosing the option that best suits you, simply follow the on-screen instructions to complete the participant addition process. Once participants are successfully added, you’ll see their information on the Assignments screen.
Don’t forget that Actual projects don’t allow you to assign new participants once they’ve been activated. So if you’re working on an Actual project, make sure you have added all new participants before moving on.
Finished adding participants? You’re ready to make payments - here's what you need to do.


